Anyone tried to make BIG dish at home?

casser said:
I´m still trying to understand how you got that perfect shape..great work!!:)

After you finish the antenna and test it, can you create a tutorial?

I prefer to use HDL_ANT to calculate focal point´s/gain/etc and it also create templates ready to print for any dish size...use Corel Draw to read the template files that HDL_ANT generate (it create *.PS files, corel draw read those files 100% and you can test it for 15/30days :D)

Yes, I use HDL_ANT also. Thank you for the newer version which I did not have before.:cool:
 
selvam said:
Dear BombedOne,
Yes I need offset dish calculation formula.

Dear BombedOne,
Please provide the offset dish calculation formula.
Expecting your reply.
 
selvam said:
Dear BombedOne,
Please provide the offset dish calculation formula.
Expecting your reply.


The link in post 259 has the formula.

Here it is- :cool:
 

Attachments

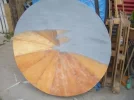
Hi Satcom1, nice work! Do you have pictures of the dish out of the jig? Do you after wards reinforce it in the back with some ribs? Or maybe an edge around the dish? Are you using the aluminum mosquito aluminum mesh from by Ace? Laying this single layer of it is enough? (You don't have to double it?)

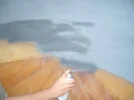
I can confirm that the spray can of RustOleum Cold Galvanize WORKS! I set up my dish a couple of days ago and got 67% signal quality, will finetune to make it better, Also, since I laid up some fibreglass on the surface, the surface is not really smooth, I will brush resin on again, and throw powdered aluminum over it, you might tried that out as well on your jig, instead of drawing & cutting the pie slices and placing them neatly in. Just wet your cloth with the resin, and sprinkle the aluminum powder over it and presto I would say, super smooth in the cloth shape, nothing sticking out on the surface what the mesh might do. I will get some aluminum powder from a marine store. The brand is West Systems, product 302.
 
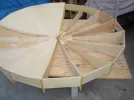
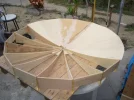
Here are pictures of my own made dish. Did some considerable work I would think to create the perfect parabola with the tools I had.

Specs: diameter 1.4metres
depth: 14cm
ribs: 9mm plywood
surface: 4mm plywood + fibreglass

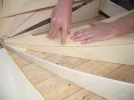
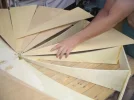
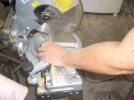
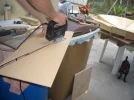
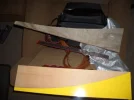
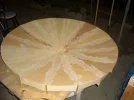
I used the dish calculator to give me the numbers for the parabola. Then i manually place the x,y coordinates point by point in coreldraw to draw my line I think I did it in a resolution of 60 nodes, so i spent some time on that. Only today I learn about this program EN_ANT as shown in above post from satcom (gosh!) could have saved me some time there. But anyways it was nice to draw everything in coreldraw. In the first picture you can see that I have my plotter/cutter cut out the parabola in vinyl that I stuck on a piece of plywood that I will use as my template for the ribs. I used the leftover pieces from the parabole cut to make the edge of the dish, I cut the angles of the edges with a miter saw so they would easy fit in the ribs (16 ribs). I used glue and nails. When all the woodwork was done, I brushed on resin and for the dish surface used fiberglass cloth for reinforcement. Used Rustoleum cold galvanize spray for the reflector. let me know what you think! I have to show more picture how I attached the LNB and how I used an old dish mount. So long!;)
 

Attachments

  • CIMG5834.webp
    CIMG5834.webp
    16.1 KB · Views: 124
  • CIMG5832.webp
    CIMG5832.webp
    16.4 KB · Views: 137
  • CIMG5831.webp
    CIMG5831.webp
    25.2 KB · Views: 130
  • CIMG5830.webp
    CIMG5830.webp
    21.7 KB · Views: 124
  • CIMG5827.webp
    CIMG5827.webp
    16.3 KB · Views: 139
  • CIMG5826.webp
    CIMG5826.webp
    26 KB · Views: 146
  • CIMG5825.webp
    CIMG5825.webp
    15.6 KB · Views: 141
  • CIMG5846.webp
    CIMG5846.webp
    26.2 KB · Views: 178
  • CIMG5845.webp
    CIMG5845.webp
    8.5 KB · Views: 143
  • CIMG5843.webp
    CIMG5843.webp
    17.7 KB · Views: 152
  • CIMG5841.webp
    CIMG5841.webp
    15.2 KB · Views: 135
sycron said:
Hi Satcom1, nice work! Do you have pictures of the dish out of the jig? Do you after wards reinforce it in the back with some ribs? Or maybe an edge around the dish? Are you using the aluminum mosquito aluminum mesh from by Ace? Laying this single layer of it is enough? (You don't have to double it?)

I can confirm that the spray can of RustOleum Cold Galvanize WORKS! I set up my dish a couple of days ago and got 67% signal quality, will finetune to make it better, Also, since I laid up some fibreglass on the surface, the surface is not really smooth, I will brush resin on again, and throw powdered aluminum over it, you might tried that out as well on your jig, instead of drawing & cutting the pie slices and placing them neatly in. Just wet your cloth with the resin, and sprinkle the aluminum powder over it and presto I would say, super smooth in the cloth shape, nothing sticking out on the surface what the mesh might do. I will get some aluminum powder from a marine store. The brand is West Systems, product 302.


Yes, today I removed the dish and laid it face down. I will add fiberglass mat and form ribs as well. In the center will be a 3/4" plywood round glassed on for bracket polar mount.

I think the aluminum powder should work best. :-worship
 
sycron said:
Here are pictures of my own made dish. Did some considerable work I would think to create the perfect parabola with the tools I had.

Specs: diameter 1.4metres
depth: 14cm
ribs: 9mm plywood
surface: 4mm plywood + fibreglass

I used the dish calculator to give me the numbers for the parabola. Then i manually place the x,y coordinates point by point in coreldraw to draw my line I think I did it in a resolution of 60 nodes, so i spent some time on that. Only today I learn about this program EN_ANT as shown in above post from satcom (gosh!) could have saved me some time there. But anyways it was nice to draw everything in coreldraw. In the first picture you can see that I have my plotter/cutter cut out the parabola in vinyl that I stuck on a piece of plywood that I will use as my template for the ribs. I used the leftover pieces from the parabole cut to make the edge of the dish, I cut the angles of the edges with a miter saw so they would easy fit in the ribs (16 ribs). I used glue and nails. When all the woodwork was done, I brushed on resin and for the dish surface used fiberglass cloth for reinforcement. Used Rustoleum cold galvanize spray for the reflector. let me know what you think! I have to show more picture how I attached the LNB and how I used an old dish mount. So long!;)


You are the man!!!!

Excellent work. You are a master carpenter.

For a BIG dish like this the Rust-Oleum paint is expensive, your idea of powdered aluminum is best. Cheapest way is applying aluminum foil over wet resin. Roll it smooth. It will form some wrinkels but if they are less then 1 mm high, will make no difference

Thank you for sharing your project !! :cool::cool::cool::cool:

I will venture you will get very good C band and all the KU there is to get. Coolsat 5000 typically $30 on Ebay (FYI)

May I suggest a BSC421 C band LNBF 13K very sensative and cheap. (Ebay)

I found cheap KU lnbs linear and circular as well as Diseqc 1.0 switches on Ebay. I have a Invacom QPH-031 but retired it for the cheap lnbf's I got off Ebay. You may want "Universal" lnbf but I found "Standard" works better with PCI programs like ProgDVB or DVBDream.

Best to stay away from BSC621-2 for small dish but on your dish it will work very good and is easy to tune. This lnbf is in my Avatar.
 
Today, I removed one dish and loaded the table up for another dish.

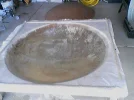
This time I added the fiberglass to the fabric with the table upside down.

This allows the fiberglass to be wetted out at the same time. So what you get is a completed dish in one step. It requires a lot of resin.
 

Attachments

  • 665A0347.webp
    665A0347.webp
    33 KB · Views: 113
Satcom1, amazing job - could you give us some more details on the fabric. I think you said you used Jersey - that the standard cotton used for t-shirts, right?

Do you know the weight of the fabric (per square meter?)

Was it brushed? like the jersey used in sweat shirts or smooth?

Again, I very impressed with your results - how easy do you think it would it be to make a 2.5m - 3m dish?
 
Payo said:
Satcom1, amazing job - could you give us some more details on the fabric. I think you said you used Jersey - that the standard cotton used for t-shirts, right?

Do you know the weight of the fabric (per square meter?)

Was it brushed? like the jersey used in sweat shirts or smooth?

Again, I very impressed with your results - how easy do you think it would it be to make a 2.5m - 3m dish?

I got the fabric at walmart weight of fabric is not important just that it stretches in both directions. By itself it forms a nice dish but resin cured dish has wrinkles. I have problems with the plastic drop cloth leaving wrinkles and am looking for a rubber or foam sheet. If foam sheet (by itself) is used it may be possible to wet it out with resin. I noticed that my foam rollers became very hard and structurely strong after cure. I looked for foam carpet pad but didn't find what I wanted.

Another approach would be to place sand over a 5 mm sheet of plastic and heat the plastic from underneath until sand pushed down the plastic into parabola.

With the proper materials a 3 meter dish should be possible. Cast it flip it and lay on reinforcing. Or use the drum method that Bombed1 suggested and leave it in the cylinder.

I hope others try these ideas and improve on them.

I'll be away on business for a couple of weeks so no new posts.
 
I know how this fabric is named, but I don't know it's english name, it's name is literally "two way sewn tricotaje"
 
Satcom1 said:
This time I added the fiberglass to the fabric with the table upside down.

This allows the fiberglass to be wetted out at the same time. So what you get is a completed dish in one step. It requires a lot of resin.


Ah, you need to have the template table installed at an angle adjustable to the vertical (about 30 degrees), and is able to revolve at about 3- 5 revolutions per hour, possibly on a timer.
No heat is required and so the saving on energy is gained, as well as a much lighter dish.
 
Guys living at cold areas can do another trick - just pour in water, and allow it to freeze. Rotate the resulting Ice upwards and voila - you have positive mold, which you can use for making fiberglass dish :)

Too pity I haven't introduced this idea during a winter here :( Now I have to wait an year or so :D
 
Satcom, how about taking the jig you have, and where the feet are, close that off, and make it like a box. Make a hole on the side. Staple your cloth over your circular opening, then..... Use the styrofoam isolation cans and spray that in the hole on the side of the box. it will expand and bubble up the cloth, presto your dish mold forever.
 
on another note. the dish that I made (see some posting earlier) in my location, I am getting only one transponder on 110W. TP 12574 with 11 channels. Last night, I mixed West System 420 Aluminum Powder with resin and brushed it over the gray cold galvanize paint, thinking I would get a more metallic shield/reflector, did not do much. I am wondering on the efficiency of my dish...Why am I only getting one transponder?
 
sycron said:
on another note. the dish that I made (see some posting earlier) in my location, I am getting only one transponder on 110W. TP 12574 with 11 channels. Last night, I mixed West System 420 Aluminum Powder with resin and brushed it over the gray cold galvanize paint, thinking I would get a more metallic shield/reflector, did not do much. I am wondering on the efficiency of my dish...Why am I only getting one transponder?

_http://www.lyngsat.com/echo10.html Check it out you are getting a spot beam for your geographic area. 110 has several spot beams that you will not be able to receive.
 
sycron said:
Satcom, how about taking the jig you have, and where the feet are, close that off, and make it like a box. Make a hole on the side. Staple your cloth over your circular opening, then..... Use the styrofoam isolation cans and spray that in the hole on the side of the box. it will expand and bubble up the cloth, presto your dish mold forever.


I had thought about this also, seems like it will work.:cool:

How many cans of Rust Oleum Galvanizing paint did you use?
 
Satcom1 said:
I had thought about this also, seems like it will work.:cool:

How many cans of Rust Oleum Galvanizing paint did you use?

I used two cans, one covered like 3/4 of dish. Tonight I temporarily stick aluminum foil over it with tape and see, if this does not work, I'll just go and by a dish. Locally they sell 1.2m dish and all works fine.. My dish is 1.4m (maybe the surface is not super smooth, parabolically speaking) I know I have some puddles on the surface and where the ribs are is the true parabola shape, between the ribs, the board seems to be a bit straighter.
 
sycron said:
I used two cans, one covered like 3/4 of dish. Tonight I temporarily stick aluminum foil over it with tape and see, if this does not work, I'll just go and by a dish. Locally they sell 1.2m dish and all works fine.. My dish is 1.4m (maybe the surface is not super smooth, parabolically speaking) I know I have some puddles on the surface and where the ribs are is the true parabola shape, between the ribs, the board seems to be a bit straighter.

I would have used six cans of this paint.


It is a great looking dish and you should get a lot of C band with it. You'll have a "dish farm" when you put up the KU 1.2 m commercial dish.

Thanks for sharing your efforts with others.:cool:
 
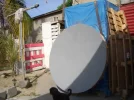
I would like to make a good performing 1.2M dish for very little money. One that uses common materials that are easy to get and tools that are simple and available most anywhere. :toke:

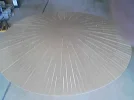
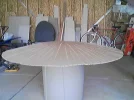
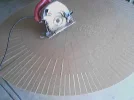
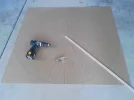
This dish is formed from a 1/8" X 4'X4' sheet of pressboard (Masonite) or 1/4" Acrylic or Galvinized sheet metal.

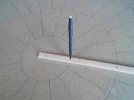
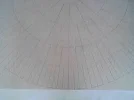
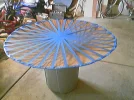
Five concentric circles divide the sheet and radial lines are marked off. See Pics. Then with a circular saw or table saw, the radials are cut. Placed over a garbage can the weight alone is enough to form the dish.

Fast drying tile mastic is rubbed into the radials and left to dry overnite. The interior dish surface is painted with 4 cans of Rust Oleum Galvinizing paint. The tape holds the dish to a parabolic shape until the mastic sets. :cool:
 

Attachments

  • 665A0446.webp
    665A0446.webp
    22.4 KB · Views: 175
  • 665A0445.webp
    665A0445.webp
    41.8 KB · Views: 191
  • 665A0444.webp
    665A0444.webp
    34.3 KB · Views: 180
  • 665A0443.webp
    665A0443.webp
    25.1 KB · Views: 167
  • 665A0442.webp
    665A0442.webp
    19.3 KB · Views: 161
  • 665A0440.webp
    665A0440.webp
    24.2 KB · Views: 166
  • 665A0447.webp
    665A0447.webp
    65.6 KB · Views: 208
Back
Top