Disaster!!

sonnetpete said:
Well done VS, I'm in awe of your work ethic and determination......No sign of a Chocolate Orange sadly, have they been consumed as a 'just reward'?

Thanks Pete ..
Well spotted re-the chocolate orange ..
;)
Each time I finished rubbing down and cleaning a lump of steel ..I treated myself to a slice ..
Gotta keep up the energy reserves don't ya know ..
:D
rgds
VS
 
Absolutely Gutted !!

I must've upset the gods at some point..

Tonight was to see the entire mount reassembled...
Err ..no..
Joined the Centre mount assembly to the ring structure...only to find ...it would not swing left to right...
Nor indeed forward or back ..
In short ...one of the Ball joints had seized..
I was extremely carefull when painting around the 2 joints ...and it turns out ...it wasn't paint.
It was rust ...inside the steel ball cup..
It moved freely enough when taken down and taken the polar mount was taken apart ..
I can only assume the joint had seized with non use ...and some water ingress during the clean up and re-paint..
It took me 4 hours to free it off ..and resulted in some minor damage to the paintjob ..
I'll have to do some touch up job once its on the pole..
I freed it off by inserting a metal drift into the joint bearing and heating the drift with a blowlamp ..
once hot ..I employed rapid cooling alternating between oil and extreme quick cooling with water..
A generous helping of force then applied with a 4lb hammer ..
once the joint moved a fraction ..the exposed erea of the ball was wire brushed ..wire wooled ..and fine emery papered ..with more oil applied ..
this process was repeated for 4 hours ...and I now have a totally free joint
Both ball joints were then oiled and copper greased ...
my hands are really hurting after this endeavour...but no way was I going to let the gods win ..
Maybe I'll finally get the polar mount up tomorrow ..but am really peeved that I have damaged the paintwork..
cest la vie..
VS
 
Hey, don't worry too much - the job has been by far and away a good 'un.

But I'm sorry you've had this hitch.

Now, I do like your technique with separating the joint, so perhaps you could pop over and get my Immersion Heater out of my HW Cyl. ............. I tried a purpose-made spanner, lots of WD40 (Not a good idea on potable water joints), a small hammer, a blow torch, a large hammer and finally a lump hammer.

Result? Fractured the end of the element casing within the water (by transmitted shock), causing water to track up the element tube and seep out of the top of the housing. Managed to seal it by cunning (Almost VS like!) deployment of an undersize 8mm compression stop-end, but there it sits to this very day. Inoperable.
 
Hi Gordon ..
I find that most metal to metal seizures can be freed off by heat and rapid cooling ...
Including seized nuts on bolt threads ..even with a generous rust crust..
In my case ...a reasonable amount of brute force could be tolerated by the structure ..
It being steel ..
but not so easy with softer metals such as copper etc..
Sorry you had problems and damage..

Heat is your friend in most cases ..as hopefully the metal surfaces expand and contract at different rates ...
allowing rapid cooling to do its work..
rgds
VS
 
Tivù said:
Hey, don't worry too much - the job has been by far and away a good 'un.

But I'm sorry you've had this hitch.

Now, I do like your technique with separating the joint, so perhaps you could pop over and get my Immersion Heater out of my HW Cyl. ............. I tried a purpose-made spanner, lots of WD40 (Not a good idea on potable water joints), a small hammer, a blow torch, a large hammer and finally a lump hammer.

Result? Fractured the end of the element casing within the water (by transmitted shock), causing water to track up the element tube and seep out of the top of the housing. Managed to seal it by cunning (Almost VS like!) deployment of an undersize 8mm compression stop-end, but there it sits to this very day. Inoperable.

Put the circular immersion spanner over it, and stick a length of pipe over the end of the spanner.

If the spanner twists cut a block of wood down so someone can hold the spanner level over the top of the immersion gubbins
 
Analoguesat said:
Put the circular immersion spanner over it, and stick a length of pipe over the end of the spanner.

If the spanner twists cut a block of wood down so someone can hold the spanner level over the top of the immersion gubbins

Totally agree with AS on this one ..
more leverage is always useful..
rgds
 
A sound, practical idea which, sadly, I have tried - and failed!

Not only did it not show the remotest sign of separating it, but the entire (and full of water!) Cyl started to shift on its base potentially causing plumbing damage. Friends, I ceased immediately.

Fortunately I'm good at oil boiler maintenance and repair .........................

But enough about me, we really should get back to VS's seized ball
 
Tivù said:
A sound, practical idea which, sadly, I have tried - and failed!

Fortunately I'm good at oil boiler maintenance and repair .........................

But enough about me, we really should get back to VS's seized ball

..ahemm ...
my balls are free and easy now m8 ...
..a joy to behold ...just like my pole
:D
VS
 
Tivù said:
.....But enough about me, we really should get back to VS's seized ball

I won't mention my dribbling overflow then........

.....a common problem with men of a certain age...
 
Just to round things off ..
A couple of snaps ..
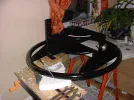
One showing the mount attached to the ring assy ..
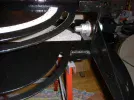
The other highlighting the troublesome ball joint ...and the now damaged paintwork..
rgds
 

Attachments

  • DSCF0036.webp
    DSCF0036.webp
    141.1 KB · Views: 52
  • DSCF0037.webp
    DSCF0037.webp
    140.8 KB · Views: 50
After today, "a couple of snaps" is probably not the best choice of words!

But it looks not too bad - once retouched and weathered it'll be aok.

And it's primary purpose is to be functional, not to be simply a joy to behold.
 
..Thanks Gordon ..
It looked much ..much..worse earlier ..
I've already rubbed down the area that got most exposure to heat ..and that area has already been given another coat of paint..
The 'spots' that remain ..as you say can be touched up later..


..perhaps should have mentioned ..the hammerite goes 'off' very quickly indeed when painted straight onto relatively hot metal..which is a bonus I suppose.
rgds
VS
 
Well friends ..
A milestone achieved..
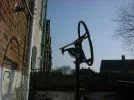
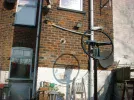
The mount is up ..and I have the perfect day to point it due south..
Clear skies and sunshine ..so can use the shadow principle ..
Anyone know a site that lists the Suns zenith time today ??
My pole is vertical enough for a good shadow to be cast.
I know where true South.. is within a couple of degrees ..but accuracy is everything ..
rgds all
VS

If anyone wants to help with this ..
My location is 53.5N ...2.35 West
 

Attachments

  • DSCF0038.webp
    DSCF0038.webp
    131.4 KB · Views: 53
  • DSCF0040.webp
    DSCF0040.webp
    196.9 KB · Views: 45
Here are a couple:

_http://www.opalexplorenature.org/sites/default/files/7/file/Solar%20zenith%20Calculator.xls

(Loads a calculator)

_http://www.sunearthtools.com/dp/tools/pos_sun.php

(Done online)
 
You can have a look at this site:

_http://www.timeanddate.com/astronomy/

Very roughly, looking at your location I'd say about 12:15 UK time.

Damn, beaten to it!
 
I'm always a bit messed up this time of year ..
Are we currently GMT+0 or GMT+1

I know I _should_ know ..
but I need to confirm it..
rgds
VS

No probs ..
Sorted it ..
I hate that they keep messing with the clocks ...
;)
rgds
 
GMT, old fruit.

Edt: Ah, you know already.
 
Pete was fairly close with 12.15

Used an online calendar generator in the end ..

_http://www.solar-noon.com/sn_check.php

I make solar noon at my location 12:20:15
rgds
VS
 

Attachments

  • solar noon.webp
    solar noon.webp
    195.8 KB · Views: 31
So just an hour and twenty minutes to limber up .................. don't forget your pencil case.
 
Indeed Gordon ..
Time eough for a brew and a bit of toast ..
;)
Intend to draw a vertical line on the white wall behind the pole at 12:20

project backwards from the mount centre and align that way ..

It wont matter that the sun carries on accross the arc then ..as I should have a semi permanent marker..
rgds
VS
 
Back
Top