Precision 2.0 metre Refurb (Barn & Bramble Rescue)

moonbase

Small Dish Man
My Satellite Setup
.
My Location
UK
Hi,

Here we go again, another Precision dish refurbishment offering.
Last year it was the Precision 2.2m dish project that started in May and was abandoned in June due to the sale of the dish. A link to last years old old topic is pasted below.

Precision 2.2 metre Antenna Install

This year the Precision dish season has started later than normal, however, the show gets on the road with a Precision 2.0m dish. The dish and associated kit is a "barn and bramble rescue" job and has not been in use since 2003/2004. A bit of pruning to some brambles was needed to extricate the dish from its resting place but the other kit just needed removing from the barn.

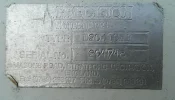
The "barn and bramble rescue" consists of a Precision 2.0m dish with feed support arms, Precision galvanised polar mount, Precision galvanised tripod ground stand and a 24" actuator (working!). I have attached a few pictures below. A low powered jet wash should remove most of the surface grime from the equipment but there are a few jobs to do with the dish to get it looking decent and operational.

That's all for now, I will be back later with updates as the bodge job refurb progresses, unless of course the project is abandoned....
 

Attachments

  • Precision Antenna (Rear Side 01).webp
    Precision Antenna (Rear Side 01).webp
    122.5 KB · Views: 155
  • Precision Antenna (Rear Side 02).webp
    Precision Antenna (Rear Side 02).webp
    137.5 KB · Views: 151
  • Precision Antenna (Label).webp
    Precision Antenna (Label).webp
    238.8 KB · Views: 123
  • Precision Antenna (Feed Support Arms).webp
    Precision Antenna (Feed Support Arms).webp
    122.6 KB · Views: 132
  • Precision Antenna (Polar Mount).webp
    Precision Antenna (Polar Mount).webp
    260.5 KB · Views: 132
  • Precision Antenna (Ground Stand).webp
    Precision Antenna (Ground Stand).webp
    415.6 KB · Views: 131
  • Barn Cat (friendly type).webp
    Barn Cat (friendly type).webp
    241.6 KB · Views: 127
First job on the dish is to remove the three bolts from the boss heads on the rear mounting ring. Not surprisingly, they are siezed up after being in place for 15 years without removal. I will try a couple of methods to see if I have any joy.
 

Attachments

  • Precision Antenna (Mounting Ring).webp
    Precision Antenna (Mounting Ring).webp
    179.6 KB · Views: 107
  • Release Juice.webp
    Release Juice.webp
    102.3 KB · Views: 105
Did the cat come with the bundle as well?

Nice kit for what sounds like not a lot (if any) money. I love those triangular Precision mounts - best ones I laid my hands on. CM ones don't stand a chance against those.

I didn't realise Precision made 2m dishes. Thought it jumped from 1.8 to 2.2.
 
Did the cat come with the bundle as well?
Nice kit for what sounds like not a lot (if any) money. I love those triangular Precision mounts - best ones I laid my hands on. CM ones don't stand a chance against those.
I didn't realise Precision made 2m dishes. Thought it jumped from 1.8 to 2.2.


CJ,

No the cat seemed very happy with the barn environment and other outbuidings in the countryside and I think it was well loved by the custodians of the property it owned. The equipment had to be purchased and transported so I did incur expenditure but the cost was acceptable. The 2.0 metre dish size was not so common but it was manufactured and is still on the list of antenna manufactured by Elite Antennas.

I agree with you about the Precision polar mounts, they are very well built and capable of taking good size dishes up to 2.4m with ease. All of the Precision polar mounts I have seen except one have been for the 600mm rear mounting ring, that includes both the triangular frame PM and the square frame PM versions. The only variant I have seen was the Precision polar mount for the 1.8m dish I sold to "aceb" which was a very early design and was ultra heavy duty.

I know that Precision used to fit a 1200mm rear mounting ring to antenna above a certain size. I think the crossover point was everything 2.8m and above had the 1200mm ring with the 2.2m and 2.4m having customer choice of 600mm or 1200mm. However, I have never come across a Precision polar mount for a 1200mm rear mounting ring.

I will probably sell the Precision triangular polar mount and Precision tripod ground stand that came with the kit as I dont really have use for them and am running out of justifucation to continually keep hoarding all things Precision. I will give them a clean up and check the bearings on the polar mount and decide what to do with them.
 
Depending on price, please allow me to have first refusal on the PM. I would eventually like to try my 1.8m PF CM dish that's been in the garage since I got it.
 
Luckily, I managed to remove the three bolts from the rear mounting ring without using heat.

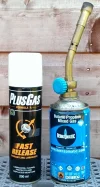
The Plus Gas releasing fluid and a torgue wrench did the job. After removing the bolts I cleaned up the internal threads of the mounting points using an M10 Tap with a squirt of cutting fluid. Couple of pics attached below.

That's the first Job done, on to the next, probably removal of the sealant around the rear mounting ring followed by a low powered jet wash.
 

Attachments

  • Bolts Removed 01.webp
    Bolts Removed 01.webp
    111.7 KB · Views: 97
  • Bolts Removed 02.webp
    Bolts Removed 02.webp
    314.5 KB · Views: 100
Depending on price, please allow me to have first refusal on the PM. I would eventually like to try my 1.8m PF CM dish that's been in the garage since I got it.


Will do CJ.

Your CM 1.8 PF is a nice dish, if I remember correctly it is the 4 petal dish that was very kindly given away by one of our members?
 
Will do CJ.

Your CM 1.8 PF is a nice dish, if I remember correctly it is the 4 petal dish that was very kindly given away by one of our members?
Yep, that was me MB
 
Today was dish cleaning day.

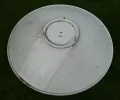
The dish was cleaned on both sides using a Jet Wash to remove non stubborn grime and debris. This was followed up with a clean using a sponge pad with either stainless steel kitchen cleaner or cif depending on how ingrained the dirt was.

There was a band of grey discolouration on the dish face that I could not remove, it looks like spray paint. At some point in the history of the dish it appears that part of it was lightly sprayed. As I dont know the type of paint it will need to be gently sanded off just in case it is metallic. It looks like grey primer of some type.

There are a few pics uploaded below from dish cleaning day.
 

Attachments

  • Dish Cleaning Kit.webp
    Dish Cleaning Kit.webp
    449.1 KB · Views: 88
  • Precision Antenna (Rear - Before Clean).webp
    Precision Antenna (Rear - Before Clean).webp
    122.5 KB · Views: 88
  • Precision Antenna (Rear - After Clean).webp
    Precision Antenna (Rear - After Clean).webp
    151.1 KB · Views: 86
  • Precision Antenna (Face After Clean).webp
    Precision Antenna (Face After Clean).webp
    110.2 KB · Views: 98
Today was dish cleaning day.

The dish was cleaned on both sides using a Jet Wash to remove non stubborn grime and debris. This was followed up with a clean using a sponge pad with either stainless steel kitchen cleaner or cif depending on how ingrained the dirt was.

There was a band of grey discolouration on the dish face that I could not remove, it looks like spray paint. At some point in the history of the dish it appears that part of it was lightly sprayed. As I dont know the type of paint it will need to be gently sanded off just in case it is metallic. It looks like grey primer of some type.

There are a few pics uploaded below from dish cleaning day.


Looking good - there just beautiful things i have to say lol.
 
Today was dish cleaning day.

The dish was cleaned on both sides using a Jet Wash to remove non stubborn grime and debris. This was followed up with a clean using a sponge pad with either stainless steel kitchen cleaner or cif depending on how ingrained the dirt was.

There was a band of grey discolouration on the dish face that I could not remove, it looks like spray paint. At some point in the history of the dish it appears that part of it was lightly sprayed. As I dont know the type of paint it will need to be gently sanded off just in case it is metallic. It looks like grey primer of some type.

There are a few pics uploaded below from dish cleaning day.

Try a bit of Tcut that might get it off.
 
Try a bit of Tcut that might get it off.

I tried a rub with some 600 grade wet and dry using it wet to prevent clogging and it just about started to make inroads into it. I might give it a go with 400 grade and also T-Cut as you suggest.
 
Agreed, Tcut is the stuff to use on that stain...

Is T-Cut a coarser particle size than CIF cream kitchen cleaner and 600 grade wet and dry? The CIF would not budge it and the 600 grade wet and dry only just started to get at it in the lighter areas of grey.

The grey band is not a stain as such, it is paint that has been either deliberately or accidentaly been sprayed onto the dish.
 
Last edited:
Is T-Cut a coarser particle size than CIF cream kitchen cleaner and 600 grade wet and dry? The CIF would not budge it and the 600 grade wet and dry only just started to get at it in the lighter areas of grey.

The grey band is not a stain as such, it is paint that has been either deliberately or accidentaly been sprayed onto the dish.
Good question, might well be a bit coarser. I have used rubbing compound before now you should be able to get that from a car accessories shop. Be careful that is quite coarse, but should do the job.
 
T-cut is not abrasive as such, the active compound inside liquifies the top coat of paint which allows removal by a fine grade cloth.
 
Today was dish sanding day.

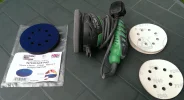
The band of grey paint that was left on the dish after yesterdays clean was removed today using sanding tools. I used an orbital sander with a sponge interface pad placed between the sander plate and the sanding disc. The sponge interface pad allows the sanding disc to curve and follow the parabolic profile of the dish.

The first attempt with P400 grade sanding discs made some inroads into the band of grey paint but progress was slow. A change over to P240 grade sanding discs provided enough cutting power to remove the grey paint band without going through the white finishing coat on the dish.

There are a few pics uploaded below from dish sanding day.
 

Attachments

  • Dish Sanding Kit.webp
    Dish Sanding Kit.webp
    346.9 KB · Views: 88
  • Precision Antenna (Face After Clean).webp
    Precision Antenna (Face After Clean).webp
    110.2 KB · Views: 87
  • Precision Antenna (Face After Sanding).webp
    Precision Antenna (Face After Sanding).webp
    71.7 KB · Views: 103
I'm back,
Today's offering is the work I have been doing recently on the Precision polar mount.

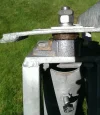
The mount itself was in good shape but as it is my intention to sell it I thought I would give it a thorough inspection and a clean up. Firstly, I gave the polar mount a gentle jet wash to remove loose dirt and grime then dismantled it to get a closer view of the top and bottom bearings.

Both top and bottom bearings inserts were in good condition with a smooth noiseless rotation. There was a bit of weathering on the outside of parts of the bearing housings but it has no impact on the functionality of the mount. I removed some of the easily accessible weathering with a fine scotch brite type of pad to reveal the original paintwork underneath.

As a point of information, the type of bearing setup used by Precision on their polar mounts were ASAHI FT203 bearing housings with 203PR-C bearing inserts.

The M16 bolts that pass through the bearings and secure the inner frame of the polar mount to the outer frame were in decent shape but had a bit of flaking to the plated finish. These were replaced with brand new stainless steel M16 bolts of the same length. The upper M16 bolt passes through the declination angle strut and a grooved square washer is used to approximately set the declination angle. This washer had a bit of corrosion on it so I rubbed it down to bare metal and gave it a few coats of cold galvanising paint.

After that it was a nipple grease followed by reassembly. Once reassembled, fresh denso tape was wrapped around both top and bottom bearing collars where they protrude from the housing to provide weatherproofing.


A few pictures of the polar mount work are uploaded below.
 

Attachments

  • Precision Polar Mount (Top Bearing).webp
    Precision Polar Mount (Top Bearing).webp
    210.3 KB · Views: 77
  • Precision Polar Mount (Bottom Bearing).webp
    Precision Polar Mount (Bottom Bearing).webp
    335.1 KB · Views: 73
  • Precision Polar Mount (Replacement Bolts).webp
    Precision Polar Mount (Replacement Bolts).webp
    287 KB · Views: 68
  • Bearing - Greased.webp
    Bearing - Greased.webp
    352.7 KB · Views: 68
  • Denso Tape (01).webp
    Denso Tape (01).webp
    199.2 KB · Views: 67
  • Denso Tape (02).webp
    Denso Tape (02).webp
    369.8 KB · Views: 71
  • Precision Polar Mount (Taped Top Bearing).webp
    Precision Polar Mount (Taped Top Bearing).webp
    363.3 KB · Views: 70
  • Precision Polar Mount (Taped Bottom Bearing).webp
    Precision Polar Mount (Taped Bottom Bearing).webp
    392.8 KB · Views: 75
  • Polar Mount On Stand (02).webp
    Polar Mount On Stand (02).webp
    530.7 KB · Views: 78
  • Polar Mount On Stand (03).webp
    Polar Mount On Stand (03).webp
    330.3 KB · Views: 96
Today's offering is more in keeping with my status as a fully paid up member of the Federation of Master Bodgers. This bit of work will definitely keep me excluded from the FART society (Fabricators And Refurbishment Technicians).

The rim of the Precision 2.0m dish had a few grazes and scratches, some of which were through to the bare aluminium. To prevent any further deterioration I thought it might be useful to clean them up and try to get them back into a reasonably weatherproof state. The areas were rubbed down with some wet and dry paper followed by priming with etch primer and finished with a top coat.

I have attached a few pictures below that present the workflow for the worst impacted area of the rim and how it looks after the bodge job. In truth, I should probably have gone all the way round the rim to bare aluminium and then primed and top coated it. The full bare metal approach would certainly have given me a better finish. I may return to the full bare metal option at some future point if I consider the dish to be a "keeper".
 

Attachments

  • Rim Repair Kit.webp
    Rim Repair Kit.webp
    223.3 KB · Views: 80
  • Precision Antenna Rim (Before Repair).webp
    Precision Antenna Rim (Before Repair).webp
    119.4 KB · Views: 83
  • Precision Antenna Rim (Repair Stage 01).webp
    Precision Antenna Rim (Repair Stage 01).webp
    97.9 KB · Views: 78
  • Precision Antenna Rim (Repair Stage 02).webp
    Precision Antenna Rim (Repair Stage 02).webp
    24 KB · Views: 76
  • Precision Antenna Rim (Repair Stage 03).webp
    Precision Antenna Rim (Repair Stage 03).webp
    17.8 KB · Views: 74
Back
Top