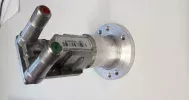
Restoring a working antique dish to full functionality..

It wasn't my plan initially Stephen ..but after discovering anything longer than 8cm (waveguid wise) results in losses I changed my approach.
It _was_ however always my intention th leave enough of the original offset waveguide to be used as a flange to bolt to the C120 feed.
OK

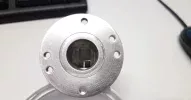
Without cutting anything else off (That Monty Python sketch), what is the inner and outer diameters of the circular cavity ?

 
OK

Without cutting anything else off (That Monty Python sketch), what is the inner and outer diameters of the circular cavity ?

Love that sketch btw...
Still waiting for my delivery...but I will post those dimensions as soon as I have them.
 
Just stick a ruler over the front end and I'll do the rest.

It might be you could have both parts threaded to secure but sleeving with aforementioned tin can might be good as a starter.
 
CH prime focus feed int diameter 20.49mm
Bullseye lnb int diameter 18.62mm
Solder pump sleeve int diameter 17.84mm

CH Prime focus feed ext diameter 22.38mm
Bullseye lnb ext diameter 23.2mm
Solder pump sleeve ext diameter 20.02 mm

it is of course only the internal diameters which are critical

since there is roughly 2mm variation between lnb and feed the feed being larger I would assume any sleeve around 19.5mm int diameter would be ideal ...so fractionally larger than the solder pump sleeve I was intending to use.
a sort of step down in stages if you will.
 
Last edited:
Whilst waiting for the calipers to arrive I decided to tackle the waveguide depth which was previously 9.8cm
We need to be in the 7 to 8cm range..
So out came the hacksaw again...and an hour later the offset feed is reduced again to the point at which the flaring reaches 3cm diameter..
This still leaves enough flange to be used to bolt the 2 items together..
It also allow me to properly measure throat diameter once those calipers arrive.
And the real purpose of this process ..reduces waveguide depth to 7.8cm (the sweet spot).
and finally ...it removes even more cast aluminium bulk...thus the sleeve piece can be even shorter.
At this point the short 'sleeve' could be made by inserting a small section of pipe into the sloping mouth of the bullseye and pouring silver epoxy into the space around the centre pipe ...and that is the route I would take if silver epoxy wasn't so ridiculously expensive.
perhaps there is a cheaper alternative I'm unaware of ?
Must be pourable/moldable and conductive when cured ?
cest la vie
rgds
Just discovered that

Aluminum Metal Repair Epoxy Adhesive Glue 1 Set Strong Bond Machinable Sandable​

can be got from China at £3 approx.....but no idea if this is truely ally ...and conductive.
Anyone used it ...???
Just asked google AI :-
Properties of Standard Metal Repair Epoxy
    • Strong Bond: Creates a rigid, high-strength structural hold on aluminum, iron, and steel without needing high heat or welding tools. [1]
    • Electrical Insulation:
    Standard epoxy resins act as electrical insulators. They block electricity rather than conduct it

  • If your repair specifically requires electrical conductivity (such as fixing circuit traces or electronic grounding tabs), standard metal repair epoxy will not work. Instead, you must use a specialized electrically conductive adhesive infused with metal particles, such as MG Chemicals 8331D Silver Conductive Epoxy Adhesive

Here is how I did it: I clamped the feed into a lathe's four-jaw chuck and machined it down at the point where it meets the waveguide. The feed then came off, allowing me to trim the waveguide to the exact half-wavelength dimension. Finally, I bonded on a flange, and the C120-flange LNB was ready.
 

Attachments

  • Bulls Eye_1.webp
    Bulls Eye_1.webp
    52.9 KB · Views: 16
  • Bulls Eye_2.webp
    Bulls Eye_2.webp
    113.2 KB · Views: 21
CH prime focus feed int diameter 20.49mm
Bullseye lnb int diameter 18.62mm
Solder pump sleeve int diameter 17.84mm

CH Prime focus feed 22.38mm
Bullseye lnb ext diameter 23.2mm
Solder pump sleeve ext diameter 20.02 mm

it is of course only the internal diameters which are critical

since there is roughly 2mm variation between lnb and feed the feed being larger I would assume any sleeve around 19.5mm int diameter would be ideal ...so fractionally larger than the solder pump sleeve I was intending to use.
a sort of step down in stages if you will.
I guess a piece of this is about the closest I've found thus far...
 

Attachments

  • pipe.webp
    pipe.webp
    76.1 KB · Views: 16
Here is how I did it: I clamped the feed into a lathe's four-jaw chuck and machined it down at the point where it meets the waveguide. The feed then came off, allowing me to trim the waveguide to the exact half-wavelength dimension. Finally, I bonded on a flange, and the C120-flange LNB was ready.
Nice but sadly I dont have access to a lathe..
I did consider trying to swage ally pipe but not sure it would respond like copper.
Pity you are in germany or I would have asked you to make me something suitable.
lol
 
You can always choose to send it to me. It’s a very quick process, and the materials and flanges are always in stock.
:Y
 
You can always choose to send it to me. It’s a very quick process, and the materials and flanges are always in stock.
:Y
I wont deny I am tempted...
Turnaround time and cost would have to be taken into consideration of course.
I'll put that on the back burner for now dreamsat as I am still searching for suitable pipe.
rgds
and again
Thanx
 
I think I may have found suitable ally tube on Amazon of all places..
Last one in stock apparently.
3 pieces 30cm length OD 23mm ID 20mm
got to be worth a punt at a tenner..
 
So ..that was quick delivery.
The 3 lengths of ally tube from Amazon just arrived.
In actual fact the internal dameter is closer to 19.7 mm than the claimed 20mm..
I'd call that a win.
 
Is this risky...
Of course.
The vibrations could theoretically damage the bullseye.
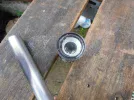
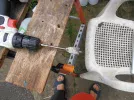
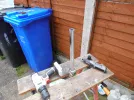
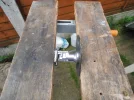
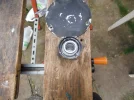
but using a small drill on slowest speed fitted with a sacrificial 22mm spade bit...I'm down about a mm into the lnb throat.
The objective to make stepped cut into the cast aluminium.
Took about an hour so far but that's because I'm doing this as slowly as I can.
certainly the spade bit will most likely never cut wood again
lol
 

Attachments

  • P1010034.webp
    P1010034.webp
    900.1 KB · Views: 85
  • P1010036.webp
    P1010036.webp
    784 KB · Views: 39
  • P1010037.webp
    P1010037.webp
    432 KB · Views: 35
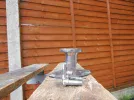
Well for good or ill ...the sleeve is in and pretty permanent now
Forced in under pressure from the workmate.
If I haven't damaged the bullseye with vibration..it will work...how well is another matter.
I guess I need to at least test it on the dish before proceeding.
 

Attachments

  • P1010038.webp
    P1010038.webp
    966.3 KB · Views: 27
  • P1010039.webp
    P1010039.webp
    579.8 KB · Views: 30
  • P1010040.webp
    P1010040.webp
    330.2 KB · Views: 29
Last edited:
..The good news IS....pause for fanfare....
It still works..
Not centred ..not clamped no skew ajustment...just hung loosly at the focus with no feed attached..
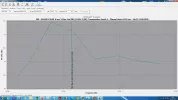
a paltry 0.4db on the beacon...But it still Functioning.
I guess I can move on to epoxy infill tomorrow....the bullseye case reasembled....the feed fitted...and another test.
 

Attachments

  • test.webp
    test.webp
    93.8 KB · Views: 32
Is this risky...
Of course.
The vibrations could theoretically damage the bullseye.
but using a small drill on slowest speed fitted with a sacrificial 22mm spade bit...I'm down about a mm into the lnb throat.
The objective to make stepped cut into the cast aluminium.
Took about an hour so far but that's because I'm doing this as slowly as I can.
certainly the spade bit will most likely never cut wood again
lol
Since the Bullseye is a crystal tuned box, there are no pucks inside that could disintegrate with vibration.
 
Well for good or ill ...the sleeve is in and pretty permanent now
Forced in under pressure from the workmate.
If I haven't damaged the bullseye with vibration..it will work...how well is another matter.
I guess I need to at least test it on the dish before proceeding.
Definitely not what I envisaged.

Are you good enough on the ladder to add spacers once the PF feed is added to the mangle ?

(After moving the cat off the lower rungs, take an image or two from the boresight, and directly down the feed, transfer is key)
 
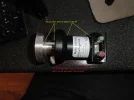
Too dark now to do any more outside ...so figured it would be nice to get an idea of what the bullseye will look like post modding.
Nothing has been bolted up as yet so just loosly together.
If for some reason I need to mount just behind the scalar feed (very likely I will have to) I would use a 40mm plastic conversion collar.
In which case I can move the tripod itself ...thus moving the whole assemby closer to or further from the base of the dish bowl..
On the Alcoa the distance from dish base to suspended feed is (optimal) at 31.5 inches
rgds
 

Attachments

  • bullseye post modding.webp
    bullseye post modding.webp
    443.3 KB · Views: 42
Last edited:
This is Christine we are talking about.
 
She's had 2 names during her long life with me...both female. PFs are always female in my head.
I always named my offsets with male names so yes Christine or Stella...take yer pick.
She was 2nd hand when I bought her.
Sad aint I

Christine is an old girl 6 petal 1.8mtr PF made in the 70s ...does that make her a boomer ?
ALCOA - made in the USA I believe. ALuminium COmpany of America
She got renamed to Stella after I made those petal extensions out of mesh embedded in fibre glass ...
Sadly they only lasted 10 years as they eventually cracked and water ingress did the rest.
but she was 2.2 mtr for a while.
Now she's back to being plain old Christine.
I do believe there was a proper aluminium powder coated petal extention kit that was available back in the day.....but I've never seen one in the flesh.
Only photograhs from some Austrian dish enthusiast.
Not sure any were ever needed or sold in the UK.
cest la vie
 

Attachments

  • P1010044.webp
    P1010044.webp
    408.5 KB · Views: 48
Last edited:
I did not recall the new name, nor know the extension parts had failed.


The pf feed you now have is designed for a relatively deep dish, it could over illuminate on the 1.8m and so the secondary clamping point might be worthwhile afterall.
 
Back
Top