Work in progress - Old Channel Master Polar Mount

remlap

Specialist Contributor
My Satellite Setup
Gibertini 104cm motorised dish with a Technomate 5402 HD CI+ and TBS 6925 + Gibertini 90cm with 9E 13E 19.2E and 28.2/5E with a Hauppauge WinTV NOVA-HD-S2 Media Centre PC and Pure EVOKE Flow Radio + 100cm Channel Master with 2 LNBs at 24.5W and 30W
My Location
Wales
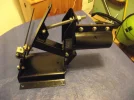
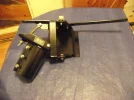
Managed to get my hands on an old Channel Master Polar Mount, its now been taken apart and taken it for sand blasting now so this thread should be in stages.

Next then is powder coating.

Sorry for poor quality, this actually stills from a flip cam and very low light even though its on a window sill
 

Attachments

  • Mount 1.webp
    Mount 1.webp
    32 KB · Views: 247
  • Mount 7.webp
    Mount 7.webp
    40.9 KB · Views: 197
  • Mount 6.webp
    Mount 6.webp
    21.8 KB · Views: 242
  • Mount 5.webp
    Mount 5.webp
    23.6 KB · Views: 220
  • Mount 4.webp
    Mount 4.webp
    31.5 KB · Views: 233
  • Mount 3.webp
    Mount 3.webp
    24.9 KB · Views: 218
  • Mount 2.webp
    Mount 2.webp
    47.6 KB · Views: 229
  • Mount 8.webp
    Mount 8.webp
    35.8 KB · Views: 206
  • Mount 9.webp
    Mount 9.webp
    31.4 KB · Views: 204
  • Mount 10.webp
    Mount 10.webp
    23.4 KB · Views: 220
Doesn't look in too bad a condition.

Look forward to the finished pictures.
 
Not to bad at all but since its such an hard bit of kit to get hold off its worth bringing back to almost new.

Cheers
 
Nice project Remlap ...
but whats with this sand blasting ...??
Did my Alcoa mount the hard way ....sanding discs and rotary wire brushes ..
..and yes ..it cost me the bearings on my Bosch drill ..
;)
 
Should serve you well when it's finished remlap. Quality item.
 
when finished will look really good ! your treating it very well powder coating it. when i did mine i could only afford hammerite. becareful because without the jack to restrain it the mount flops about and can damage the new finish (experiance speaking).
 
purplemarina said:
when finished will look really good ! your treating it very well powder coating it. when i did mine i could only afford hammerite. becareful because without the jack to restrain it the mount flops about and can damage the new finish (experiance speaking).

Thanks for the tip will bare that in mind, while I love this forum even for simple little tips like that :)
 
Nice, it will be good once refurbished, i'm still looking around for one.

Are you going to replace your current dish or run 2 motorised dishes ?
 
wod said:
Nice, it will be good once refurbished, i'm still looking around for one.

I hope so.

Isn't the Jaeger any good? Would love the one that has incline tracking think that's the EL model.

wod said:
Are you going to replace your current dish or run 2 motorised dishes ?

Not sure yet
 
Yeah it's great but after a polar mount to refurbish as the 1224 motor is out of production and want a spare incase.
 
Scanned and retouched label.

Hopefully I can get this printed on some sticky back vinyl with a laser printer or might even laminate a regular A4, cut and glue.
 

Attachments

  • cropped label resized 3.webp
    cropped label resized 3.webp
    102.7 KB · Views: 116
Bit ashamed by the quality of these photographs but anyway still not charged a stills cam so here's the mount after sandblasting, assembled a little bit to get it into frame.

Still a bit of cleaning to do by hand.
 

Attachments

  • Mount 12.webp
    Mount 12.webp
    13.9 KB · Views: 172
  • Mount 11.webp
    Mount 11.webp
    13.5 KB · Views: 178
Woke up this morning to find some kind person on reddit.com had recreated me the sticker on the adjustment bolt.

Print size of 50mm x 104mm
 

Attachments

  • IAB5g.webp
    IAB5g.webp
    22.9 KB · Views: 147
It all looks good so far, what colour are you going to have the mount powder coated in ?

I remember seeing mounts in black and grey colours.
 
wod said:
It all looks good so far, what colour are you going to have the mount powder coated in ?

I remember seeing mounts in black and grey colours.

Almost positive it will be black mate.

Today bought some sticky back vinyl A4 size that can be used with my laser printer for the three new labels, plus a strip of anti slip tape to go inside the mount to replace the stuff that was originally there.

Spent some time tonight trying to get the sparkle back into the stickers for printing.
 

Attachments

  • Label shinny.webp
    Label shinny.webp
    113.7 KB · Views: 110
Nearly all done, its been through powder coating, new stainless nuts, bolts and washers and I've added two home made decals in weather proof vinyl.

Top hat bearings and inserts were in good condition they only needed general cleaning and refitting.

In the last picture you can just see that I've added anti slip slightly abrasive tape.

Not sure what do with adjustment bolt and clip for the declination adjuster, might trying plating them at home in a nickel sulphate solution using a couple of batteries as a power source. Any suggestions on this would be great.

To me it looks great.
 

Attachments

  • 6.webp
    6.webp
    510.1 KB · Views: 195
  • 5.webp
    5.webp
    397.9 KB · Views: 195
  • 4.webp
    4.webp
    418.5 KB · Views: 191
  • 3.webp
    3.webp
    563.8 KB · Views: 208
  • 2.webp
    2.webp
    533.4 KB · Views: 224
  • 1.webp
    1.webp
    539.4 KB · Views: 226
  • 7 Abrassive Strip.webp
    7 Abrassive Strip.webp
    302.3 KB · Views: 188
Very nice, just looks like how it would be in new condition, worth the time and effort to restore it.

anti slip tape, what is that because I wondered how it would stay in position.
 
That looks an excellent job !! have you changed the dish bolts to stainless to match ? did you print off the adjustment bolt scale? i have printed one on paper and sealed it with pva, im thinking of trying to seal it with clear varnish, what ever goes on the bolt needs to be quite thin so the nuts goes over the top. (the original looks like some sort of paper).
 
purplemarina said:
That looks an excellent job !! have you changed the dish bolts to stainless to match ? did you print off the adjustment bolt scale? i have printed one on paper and sealed it with pva, im thinking of trying to seal it with clear varnish, what ever goes on the bolt needs to be quite thin so the nuts goes over the top. (the original looks like some sort of paper).

Thanks purplemania.

Not yet thought about the dish bolts, but you've got a good idea there.

As for the scale, I've printed it on the waterproof vinyl which is thin, but I've put it aside till I work out what to do with the adjustment bolt, as I said may plate it at home.

Was kind of the person on reddit to recreate it for me and now you so that's awesome.

wod said:
Very nice, just looks like how it would be in new condition, worth the time and effort to restore it.

anti slip tape, what is that because I wondered how it would stay in position.

Thanks Wod.

Check eBay: 270886130220

Cheers.
 
Back
Top