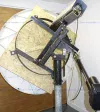
Channel Master 1.8 Restoration

I am more used to working on things under a microscope than this. I have ordered various cutting and grinding tools as suggested by BM & MB as most of my tools are meant for sub-mm work.

Things will change when you start the 3.8 install s-b, you need strong back, just picked up levelling system for my build each section weighs 150lb :eek:
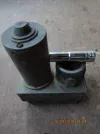
IMG_2616.webp
 
Interesting! That looks like piece of the old bridge. :D How do you plan to put it to work?

Yes part of old bridge :) it will be fixed to construction on wheels square box section bolted to it with round adaptor bolted to box section for dish mount
 
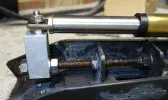
I did not see such a solutions before! Usually nut at point A is with nylon inside so it does not move freely. Seems that somebody welded this nut without thinking. In that case you can cut piece of the bolt along the green line.
I may do that, however, until I get all the other bits together to see how they will fit I was trying to avoid it as it will mean that the actuator may have to go further out the other end of the assembly.
Yes part of old bridge :) it will be fixed to construction on wheels square box section bolted to it with round adaptor bolted to box section for dish mount
If you wanted the "Thunderbirds" option of hiding the dish in a garage when not in use, try these:
Permaquip rail trolley / railway track transport trailer / trolley
Permaquip rail scaffold trolley / railway track tower transport trailer /
then all you need is to get some track laid. At least there should not be too much error in re-positioning when moved if the dish is on rails.
Alternatively, to get around PP, how about a nice boulder in the garden? Satellite Rock Cover
 
Last edited:
...then all you need is to get some track laid. At least there should not be too much error in re-positioning when moved if the dish is on rails.

Dishes on railway tracks? No problem. Mullard observatory up the road from me -


Lords Bridge.webp
 
If you wanted the "Thunderbirds" option of hiding the dish in a garage when not in use, try these:
Permaquip rail trolley / railway track transport trailer / trolley
Permaquip rail scaffold trolley / railway track tower transport trailer /
then all you need is to get some track laid. At least there should not be too much error in re-positioning when moved if the dish is on rails.
Alternatively, to get around PP, how about a nice boulder in the garden? Satellite Rock Cover
Spoke with planning and as long as its on wheels no problem the structure needs to be 6ftx6ft for stability in windy conditions it also need to be able to hold 1.5 tonne, the links look like they could be modified but will still need work and maybe upgrade wheels,

Just been to see a lead about wheels and got 10 HD for £30 pick them up tomorrow I have lots of steel work around the workshop and like to make things i retired last week so got to keep going doing something :)
 
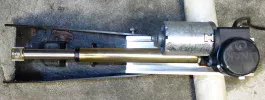
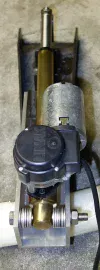
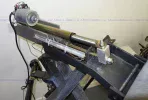
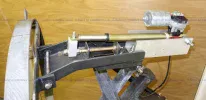
I got some more bits in the post. The U channel is all I could find, it really needs to be a bit taller so I may shim it so that the actuator is parallel with the threaded rod. Nothing is properly fixed at the moment and the threaded rod is still held buy the welded nut. Once I've worked out all the angles I will know if I can chop a bit of the threaded rod so I can drill the offending nut. I plan to put a weather shield over the whole lot eventually. These pics may make things clearer.

linak_73.webp linak_74.webp linak_75.webp linak_76.webp
 
Another option would be to remove the tube and fix a socket to the motor then onto the nut, ive seen this design and it works well, nothing wrong with your design, another option to think about
IMG_2618.webp IMG_2619.webp IMG_2620.webp
 
Another option would be to remove the tube and fix a socket to the motor then onto the nut, ive seen this design and it works well, nothing wrong with your design, another option to think about
Good idea but the original mount did not seem to lend itself to it and I couldn't work out how to implement it.

I wouldn't call it a design, it just happened that way. There was something wrong with it though. Due to the slight angle away from perpendicular to the hole in the fixed bracket, the thread on the rod caught on the edges of the bracket. Even the small jack can bend 12mm rod! I replaced the rod with a 12mm brass rod threaded just as far as necessary. It hasn't been tried with the dish but seems ok so far. Now I need an 80mm post.

decl_97.webp decl_1200.webp
 
Back to this. I've fitted a couple of micro-switches to add safety limits to the declination arrangement. Then I put it all together to make sure that nothing mangles anything when the drive runs. It seems to work smoothly. The polar actuator is only to hold it together, I'll use a heavier one eventually. The tripod stand is also temporary.

Still a few things to do including: get a few more SS fixings, make a cover for the declination drive and create or acquire a better stand. Oh, and add the dish.

declination_1469_std.webp declination_1472_std.webp oblique_1475_std.webp side_1467_std.webp
 
Looking good G..
 
Nice to see it back in action. Good job!
 
Still a few things to do including: get a few more SS fixings, make a cover for the declination drive and create or acquire a better stand. Oh, and add the dish.
Of which you have full detail of the forward dead weight of course. You might have a go with an inverted setup to prolong the actuator life.
 
Thanks for all the comments.
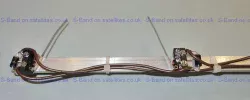
Here's a not particularly interesting pic of the end stop switches:

end_switches_1477_std.webp

Nice to see it back in action. Good job!
It was well made to start with;)

I think that actuator top got to be attached closer to dish
I'm a bit confused by that. The declination actuator arrangement was the best I could work out as it was a conversion of a pre-set system. It seems to work fine. The polar actuator attachment points are fixed and the actuator shown was only there to hold the mount in one place whist I worked on it.

Of which you have full detail of the forward dead weight of course. You might have a go with an inverted setup to prolong the actuator life.
It is front heavy but hopefully it will be ok, it has survived since CROSSBONES made it. I'm not sure I can work out how to invert the dish without a lot of effort.
 
I checked the angles for the inclined tracking again and they showed it could only track -1 to +8ish deg. So, I took it all apart for the 100th time and chopped a bit out of the U channel that was preventing the slide moving far enough. (some earlier photos show the U channel) Now it will do -5 to +8ish. I added the cover which was made from the case of a scrap piece of test gear (don't mock my metal folding ability). I may add something on the ends of the cover to stop rain blowing in.

Unfortunately, the dish shrank over winter.....

1.2_on_1.8_mount_1484_std.webp 1.2_on_1.8_mount_1479_std.webp

I'm glad I tried it all with a small dish as it showed up a few things without doing any damage. The one left to fix is the play where the polar axis part meeds the pole sleeve. I need to shim that out a bit but I'm fed up with taking it apart and reassembling it.
 
The main problem of all polar-mounts is the fact that antenna's center of gravity (somewhere in red circle) is located much above the turning axis of the mount (yellow line). Heavier the dish- bigger the problem. Because of this, phenomenon "dish flopping" can happen. Of course it is possible to use more powerful actuator to deal with the problem, but, anyway, even for more more powerful actuator pulling the dish from the end position is not easy task. There are couple of ways how to fix it.... Use additional counterweight to balance the system. And another way is to lower center of gravity of the dish till it gets to the yellow line. When center of gravity of the dish is located on the turning axis of the mount then system becomes balanced and flopping is not possible at all. There is VIDEO how antenna behaves when system is balanced.
 

Attachments

  • ScreenHunter_294 Apr. 23 00.05.webp
    ScreenHunter_294 Apr. 23 00.05.webp
    74.8 KB · Views: 61
Back
Top