
A
archive10
Guest
Made new arms for the CM180 during the past weeks.
Sold my spare reflector on condition that it had some sort of arms. So I had to come up with something usable but still cheap compared to ordering new ones.
Construction was greatly facilitated by having a CM180 already pointed properly at 28.2E. I just removed the original feed-arms assembly, and fitted the new contraption. Even made "pointer" from a wooden frame, pointing to the center front of the LNB to give me a head-start.
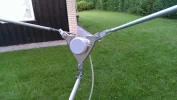
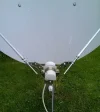
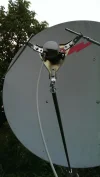
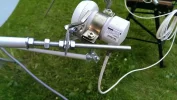
Arms are really just 6mm threaded rods, with aluminum tubes as outer casing / strength support. First version had 8 mm Ø alu tubes for outer casing on all arms, but this turned out not to be rigid enough for the feed-arm (bottom-most arm). Replaced it with a 10 mm Alu tube, and used nut/washer/nut combinations at regular intervals to fill out the tube.
This highlights that the feed arm is really bearing most of the weight of the LNB in a compression-setting. The two other feed-support-arms are in tension, so they don't required that much stiffness. The 0.6 mm rod in a 0.8 mm tube was simply not rigid enough. The whole assembly bounced up and down, any wind would screw up the signal (and worse, I had massive problems tuning the set-up).
LNB holder is (the only) remnant from my Jonsa 180cm PF dish (rest has gone to the scrap heap. Interestingly, the LNB bracket is rust-proof, whereas the dish was not). As the angles didn't match up at all, I had to make adapters for all three corners of the LNB holder. Quite some experimentation was required to get the LNB angle right - initally it was pointing too low on the reflector.
Brackets for attaching to dish face are off-the-shelf angle brackets bent with pliers to suitable angle. Had to drill out the screw holes to make them fit the 6mm rods, this will probably leave some scars exposed to rust at some later stage.
Total expense on parts: around GBP 30.
Time taken: about 8 working hours.
(in other words - not worth the expense, ut reward is in the result...)
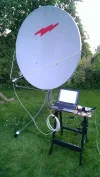
(first batch of pics)
Sold my spare reflector on condition that it had some sort of arms. So I had to come up with something usable but still cheap compared to ordering new ones.
Construction was greatly facilitated by having a CM180 already pointed properly at 28.2E. I just removed the original feed-arms assembly, and fitted the new contraption. Even made "pointer" from a wooden frame, pointing to the center front of the LNB to give me a head-start.
Arms are really just 6mm threaded rods, with aluminum tubes as outer casing / strength support. First version had 8 mm Ø alu tubes for outer casing on all arms, but this turned out not to be rigid enough for the feed-arm (bottom-most arm). Replaced it with a 10 mm Alu tube, and used nut/washer/nut combinations at regular intervals to fill out the tube.
This highlights that the feed arm is really bearing most of the weight of the LNB in a compression-setting. The two other feed-support-arms are in tension, so they don't required that much stiffness. The 0.6 mm rod in a 0.8 mm tube was simply not rigid enough. The whole assembly bounced up and down, any wind would screw up the signal (and worse, I had massive problems tuning the set-up).
LNB holder is (the only) remnant from my Jonsa 180cm PF dish (rest has gone to the scrap heap. Interestingly, the LNB bracket is rust-proof, whereas the dish was not). As the angles didn't match up at all, I had to make adapters for all three corners of the LNB holder. Quite some experimentation was required to get the LNB angle right - initally it was pointing too low on the reflector.
Brackets for attaching to dish face are off-the-shelf angle brackets bent with pliers to suitable angle. Had to drill out the screw holes to make them fit the 6mm rods, this will probably leave some scars exposed to rust at some later stage.
Total expense on parts: around GBP 30.
Time taken: about 8 working hours.
(in other words - not worth the expense, ut reward is in the result...)
(first batch of pics)








 , it wont be long before you get that welder ;).