A
archive10
Guest
Hakon said:Yes thats the one
I've been looking too much at your postings 8)
Hakon said:Yes thats the one
 ...
... ")

Chrisby said:Hi
Congratulations on an excellent set up.
Odd you can't get ITV3 and +1.
All 2D channels solid as a rock, regardless of weather, here on W.Fyn.
We're using a 120cm Gilbertini dish with any reasonable LNB and Fortec Star Passion HD receiver.
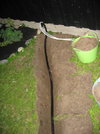
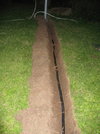
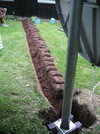
Chrisby said:As you have used pressure treated lumber for your cross ties I would backfill with large (say 2") gravel to keep everything as dry as possible. I used 4"" x 4" pressure treated timber as a base for our greenhouse and it has all but rotted away inside ten years just resting on sand. You should probably use another layer of waterproofing over the construction before the gravel goes in. The big gravel don't migrate across the lawn when you are mowing and is easily removed if you want to check your construction.
Clever idea to use pre-cast, post anchors. My Gilbertini blew over in a typical Danish storm. Now its massive, cast iron, drawing board stand is held down with an ugly stack of concrete fence posts. Though it hasn't moved in years!
View attachment 36033
I may well borrow your anchor idea to get rid of my ugly, concrete posts. :-righton
Captain Jack said:Very tidy!
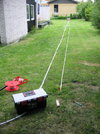
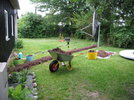
Captain Jack said:What's that dish lying on the ground in the first picture?
)Captain Jack said:Do you get anything on 1N spotbeam? I kinda lost track after the threads became longer than War and Peace.
jibali said:hi can you help please, can you tell me the size of the ( 3 feed support arms )or feed rods for the 1.8m channel master dish. help would be appeciated thank you