jeallen01
Specialist Contributor
- Joined
- Oct 12, 2003
- Messages
- 6,674
- Reaction score
- 2,630
- Points
- 113
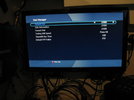
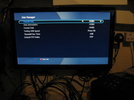
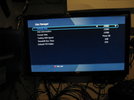
- My Satellite Setup
- See Signature
- My Location
- Somewhere in England (possibly?)!
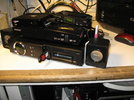
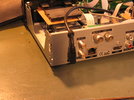
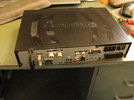
Now having 2 of these, I want one in the lounge AV rack - but, the last time I did that and connected an external hard disk to the rear USB port, it was a nuisance having the disk enclosure sitting anywhere near the box and the cable kept getting dislodged at one end or the other.
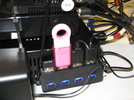
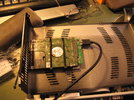
Decided to try and fix this issue by seeing if I could mount the disk inside the enclosure, and that's what I've just managed to do - and the key to keeping the whole job neat & quick was having:
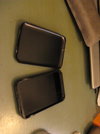
- a cheap external 2.5" USB3 enclosure which held the disk, and which I was prepared to "sacrifice" to remove both the disk (mine is an old 320GB one, but you can use what you want) and the tiny USB3-SATA interface board. These enclosures are cheap (generally <£10) and easily obtained.
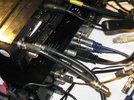
- the right cable to run between the rear USB2 port and the USB3 port on the interface board - and those aren't so easy to find because the cable from the rear USB port has to be a 90 deg one with the cable exiting upwards - but this is the one I eventually found, and it arrived a day or so ago.
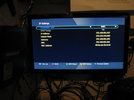
After that the job was quite easy - took about 90 mins start to finish, and the photos below show what I finished up with - including the now-empty external disk case (but there is no photo of the chassis mostly wrapped in clingfilm to stop the swarf getting everywhere when I drilled and filed it!).
One thing to note: this USB-SATA interface board had a slight angular offset to allow the disk to be connected in the USB case without removing the board, and that meant that, when installed in the TM, it forced the USB connector against the TM case - so I packed some foam strip under the end of the disk to raise it slightly, and that stopped the connector touching the case.
Decided to try and fix this issue by seeing if I could mount the disk inside the enclosure, and that's what I've just managed to do - and the key to keeping the whole job neat & quick was having:
- a cheap external 2.5" USB3 enclosure which held the disk, and which I was prepared to "sacrifice" to remove both the disk (mine is an old 320GB one, but you can use what you want) and the tiny USB3-SATA interface board. These enclosures are cheap (generally <£10) and easily obtained.
- the right cable to run between the rear USB2 port and the USB3 port on the interface board - and those aren't so easy to find because the cable from the rear USB port has to be a 90 deg one with the cable exiting upwards - but this is the one I eventually found, and it arrived a day or so ago.
After that the job was quite easy - took about 90 mins start to finish, and the photos below show what I finished up with - including the now-empty external disk case (but there is no photo of the chassis mostly wrapped in clingfilm to stop the swarf getting everywhere when I drilled and filed it!).
One thing to note: this USB-SATA interface board had a slight angular offset to allow the disk to be connected in the USB case without removing the board, and that meant that, when installed in the TM, it forced the USB connector against the TM case - so I packed some foam strip under the end of the disk to raise it slightly, and that stopped the connector touching the case.
") - just a cheap one from ebay, like some you can find
- just a cheap one from ebay, like some you can find