Precision 2.2 metre Antenna Install

moonbase

Small Dish Man
My Satellite Setup
.
My Location
UK
Hi,

After gaining inspiration from the very well documented installation topics of other forum members I thought it would be appropriate to create an installation topic of my own. Well, here we go, its the installation of a Precision 2.2 metre motorised antenna, carried out by a decades long member of the Federation of Master Bodgers.

The first stage of the installation will be to get the antenna on its stand onto a mobile pallet that can be secured in a sheltered corner of the patio. When I am able to work on the installation, the plan is to move the setup on the mobile pallet out from the corner and roll it back into the corner at the end of the day.

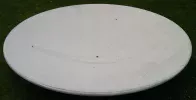
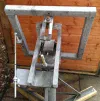
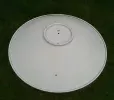
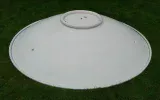
A few pictures of the antenna, polar mount and ground stand are attached below.


Rgds
 

Attachments

  • Antenna_01.webp
    Antenna_01.webp
    325.2 KB · Views: 125
  • Antenna_02.webp
    Antenna_02.webp
    145.4 KB · Views: 117
  • Antenna_03.webp
    Antenna_03.webp
    97.8 KB · Views: 114
  • Antenna_04.webp
    Antenna_04.webp
    131.5 KB · Views: 113
  • Feed_Support_Arms_01.webp
    Feed_Support_Arms_01.webp
    207.9 KB · Views: 115
  • Precision_Stand_01.webp
    Precision_Stand_01.webp
    220.8 KB · Views: 118
  • Polar_Mount_01.webp
    Polar_Mount_01.webp
    175 KB · Views: 120
  • Polar_Mount_02.webp
    Polar_Mount_02.webp
    243.4 KB · Views: 124
  • Polar_Mount_03.webp
    Polar_Mount_03.webp
    272.4 KB · Views: 121
Nice! Looking forward to installation and more pictures !


CJ

Plenty more pictures to follow as things proceed. I am hoping to get the dish cleaned up a little today before it goes on the stand, it should be easier while it is on the ground.


Rgds
 
Hi,

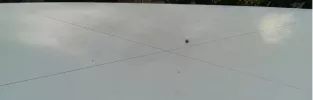
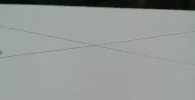
I only have a little bit of progress to report today as the day job got in the way. Anyway, I cleaned the antenna both sides with warm soapy water followed by lots of rinsing then a dry with some towel roll. I also repeated the string test using fishing line instead of the coarse twine I used in the first string test.

The rear side of the antenna was more dirty than the face but with the rear side it was general dirt and algae. The antenna face had some staining coming from the feed support arm holes, presumably from some type of bolt releasing fluid or lubricant running down the face from the arm holes. A clean with soapy water did not have much impact on the stains but the general light dirt on the face was removed.

During the cleaning, I noticed that the finished coating was quite thin in places. In some areas the aluminium although not directly visible is "blooming" through the coating. It shows up as a very pale blue tint where the coating is at its thinnest. It's not an issue that would impact on the performance of the antenna but I might consider applying a coat of paint in the future. I think the colour code is White RAL 9010, there should be no problem getting coded paint made up.

The other thing I noticed about the finish before cleaning was that the surface was very powdery. If I gently ran my fingers over the surface my finger tips were covered in white powder. I an not sure why this is, possibly due to the finish being very thin and losing its adhesion? Any feedback on this point would be most appreciated.

Finally, on the subject of the repeated string test with fishing line, I have come to the conclusion fishing line is a poor choice unless you are quick. After a while, the fishing line starts to sag, this might be due to it slipping in the tape holding it to the edges of the antenna or due to its own elasticity. However, when taught, the fishing line string test showed no gaps, same as the coarse twine test which seems to indicate the antenna is not warped.

Todays pics are attached below.


Rgds
 

Attachments

  • Antenna_01 (before cleaning.webp
    Antenna_01 (before cleaning.webp
    325.2 KB · Views: 67
  • Antenna_07 (after cleaning).webp
    Antenna_07 (after cleaning).webp
    237.1 KB · Views: 65
  • Antenna_08 (after cleaning).webp
    Antenna_08 (after cleaning).webp
    208.3 KB · Views: 60
  • Antenna_03 (before cleaning).webp
    Antenna_03 (before cleaning).webp
    97.8 KB · Views: 61
  • Antenna_09 (after cleaning).webp
    Antenna_09 (after cleaning).webp
    132.7 KB · Views: 60
  • Antenna_04b (fishing line).webp
    Antenna_04b (fishing line).webp
    100.1 KB · Views: 63
  • Antenna_04c (fishing line).webp
    Antenna_04c (fishing line).webp
    33.2 KB · Views: 61
Hi,

I only have a little bit of progress to report today as the day job got in the way. Anyway, I cleaned the antenna both sides with warm soapy water followed by lots of rinsing then a dry with some towel roll. I also repeated the string test using fishing line instead of the coarse twine I used in the first string test.

The rear side of the antenna was more dirty than the face but with the rear side it was general dirt and algae. The antenna face had some staining coming from the feed support arm holes, presumably from some type of bolt releasing fluid or lubricant running down the face from the arm holes. A clean with soapy water did not have much impact on the stains but the general light dirt on the face was removed.

During the cleaning, I noticed that the finished coating was quite thin in places. In some areas the aluminium although not directly visible is "blooming" through the coating. It shows up as a very pale blue tint where the coating is at its thinnest. It's not an issue that would impact on the performance of the antenna but I might consider applying a coat of paint in the future. I think the colour code is White RAL 9010, there should be no problem getting coded paint made up.

The other thing I noticed about the finish before cleaning was that the surface was very powdery. If I gently ran my fingers over the surface my finger tips were covered in white powder. I an not sure why this is, possibly due to the finish being very thin and losing its adhesion? Any feedback on this point would be most appreciated.

Finally, on the subject of the repeated string test with fishing line, I have come to the conclusion fishing line is a poor choice unless you are quick. After a while, the fishing line starts to sag, this might be due to it slipping in the tape holding it to the edges of the antenna or due to its own elasticity. However, when taught, the fishing line string test showed no gaps, same as the coarse twine test which seems to indicate the antenna is not warped.

Todays pics are attached below.


Rgds


Fabulous dish, looks good cleaned up and that mounting frame is the mutts nuts. Wonder if he used WD40 that's caused the staining ?. That staining might be a bit of a pig to totally remove if it's soaked itself well into the thin powder coat.
Crack on.
 
Yes nice polar mount. Similar to the triangular one but never seen one in flesh.

For stringing, I drilled small holes on the sides of the dish to feed strings through. Mine is also a fishing line but quite thick at 0.75mm - no sagging after several months.

What are you looking to receive? C band?
 
...Wonder if he used WD40 that's caused the staining ?. That staining might be a bit of a pig to totally remove if it's soaked itself well into the thin powder coat.
Crack on.


John,

Yes, my first thoughts were that the staining could be from WD40 or PlusGas or something similar.

Although the staining should have no impact on the antenna performance I have a slight concern that it could possibly prevent adhesion of some paint types should I decide to paint the dish. However, I gave the stained areas a good clean with soapy water containing washing up liquid followed by a rinse and a dry. Hopefully, any organic residues from the staining will have been washed away.


Rgds
 
Yes nice polar mount. Similar to the triangular one but never seen one in flesh.
For stringing, I drilled small holes on the sides of the dish to feed strings through. Mine is also a fishing line but quite thick at 0.75mm - no sagging after several months.
What are you looking to receive? C band?


CJ,

Yes, the antenna will be for C band. However, I will setup the arc on Ku band then switch over the feed arrangement to C band. I might have a quick peek at the Ku performance on a few signals that are borderline in the UK to see how it fares.

I will check the thickness of the fishing line I used, it was a lot thinner than 0.75mm so it probably slid out of tension due to the tape not getting enough grip on it. I was going to repeat the test with half a brick suspended at each end to keep the line taught. However, its a bit of a faff about and my two tests so far have yielded the same resut of no gap.


Rgds
 
CJ,

Yes, the antenna will be for C band. However, I will setup the arc on Ku band then switch over the feed arrangement to C band. I might have a quick peek at the Ku performance on a few signals that are borderline in the UK to see how it fares.

I will check the thickness of the fishing line I used, it was a lot thinner than 0.75mm so it probably slid out of tension due to the tape not getting enough grip on it. I was going to repeat the test with half a brick suspended at each end to keep the line taught. However, its a bit of a faff about and my two tests so far have yielded the same resut of no gap.


Rgds


Re: swapping bands, this is what I do as a quick fix band changer on my 2.2mtr remembering that I use an AV-Comm barrel. I use a Octagon twin pll Ku band lnb and just insert it into the end of the barrel using stiff foam padding to keep the thing central and for easy back / forth focal point adjustment. It's a bit Heath Robinson / rough & ready, but it's quick, no engineering involved. When you have had enough of Ku, just pull it out of the barrel throat and 321 were back in the Cband room. I removed the original Octagon feed meant for off-set antennas and grafted a Precision PF feed onto the front of my Octagon for better illumination.
 
Re: swapping bands, this is what I do as a quick fix band changer on my 2.2mtr remembering that I use an AV-Comm barrel. I use a Octagon twin pll Ku band lnb and just insert it into the end of the barrel using stiff foam padding to keep the thing central and for easy back / forth focal point adjustment. It's a bit Heath Robinson / rough & ready, but it's quick, no engineering involved. When you have had enough of Ku, just pull it out of the barrel throat and 321 were back in the Cband room. I removed the original Octagon feed meant for off-set antennas and grafted a Precision PF feed onto the front of my Octagon for better illumination.


John,

Thank you for the tip, its a quick Ku band to C band conversion technique. I think I bought a pair of those Octagon PLL Ku band LNB's a while back, they are probably stashed away in the loft.


Rgds
 
John,

Yes, my first thoughts were that the staining could be from WD40 or PlusGas or something similar.

Although the staining should have no impact on the antenna performance I have a slight concern that it could possibly prevent adhesion of some paint types should I decide to paint the dish. However, I gave the stained areas a good clean with soapy water containing washing up liquid followed by a rinse and a dry. Hopefully, any organic residues from the staining will have been washed away.


Rgds

I have the same/similar mark on the larger dish here. Precision supplied almost all bolt up parts out of stainless steel, but it was common practice to extend the feed arms slightly by packing out with additional spacers at the dish end to cope with the revised f/d ratio of non standard feeds. These then corrode over time and the stained rainwater runs down the back and front of the dish.
 
I have the same/similar mark on the larger dish here. Precision supplied almost all bolt up parts out of stainless steel, but it was common practice to extend the feed arms slightly by packing out with additional spacers at the dish end to cope with the revised f/d ratio of non standard feeds. These then corrode over time and the stained rainwater runs down the back and front of the dish.


CH,

Thank you for your input.

Unfortunately I do not know the full provenance of the dish since purchased new so have no idea if it had been fitted with a non standard feed in its history. It came to me with an original Precision Ku feed, C120 waveguide adapter and original suport arms.

The staining is not that bad, its moderate but refuses to budge with a hot soapy water wash. As I stated above, I may paint the dish as the coating is rather thin, my concern would be that the staining may impact the adhesion of a coat of paint or cause it to bubble/flake after a period of time?

If you are in my area you are very welcome to pop in for a cuppa and a look at the dish together with the other kit that came with it.


Rgds
 
Last edited:
Hi,

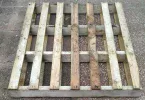
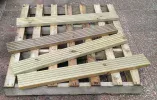
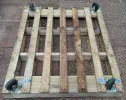
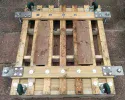
The next stage of the install is to get the antenna off the lawn and onto a stand so that I can work on it. The plan is to mount the antenna on a temporary mobile pallet that can be wheeled into a sheltered corner of the patio and secured. When I have time to work on the antenna and on a calm day, the mobile pallet can be moved out from the sheltered corner into a position that gives access for work.

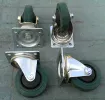
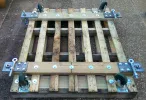
The pallet has castors at each corner, each castor has a theoretical load bearing of 330lb, giving a theoretical load bearing for all 4 castors of 1320lb. In practice, this should be reduced by one castor to allow for a safety margin, this gives a practical load bearing for the pallet of 990lb subject to the pallet being able to accept the weight. As the antenna will be stored in a sheltered corner and only moved out on a calm day, it is not my intention to load the pallet to 990lb, I have doubts that it could bear that weight, however, to increase the load bearing capacity I have screwed and bolted some additional wood to the original carcass.

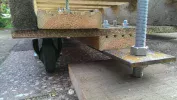
To immobilise the pallet, I have placed a steel plate with welded nut at each corner. By using a 1" BSW threaded eye bolt in each plate the pallet can be raised until the castors are no longer in contact with the ground. Wooden chocks or 4" fence posts can be placed underneath the pallet to provide additional support when the castors are off the ground.

Anyway, that is the plan, it may or may not work, I will know more when I place the tripod stand on the pallet and then get one or two people to stand on the pallet to test stability. If it does not work then its back to the drawing board for Plan B (not formulated yet, typical bodger philosophy).

For a permanant installation of the antenna, the plan is to replace the wooden mobile pallet with a larger and more robust metal mobile frame that can be immobilised and that will accept the weight required to correctly anchor the antenna. Elite Antennas give the wind load of a 2.2m antenna as 600lb for a 60mph wind and 2500lb for a 125mph wind


Pictures of the temporary wooden mobile pallet are attached below.


Rgds
 

Attachments

  • Pallet_01.webp
    Pallet_01.webp
    375 KB · Views: 58
  • Pallet_02.webp
    Pallet_02.webp
    303.9 KB · Views: 55
  • Pallet_03.webp
    Pallet_03.webp
    130.4 KB · Views: 56
  • Pallet_04.webp
    Pallet_04.webp
    506.4 KB · Views: 53
  • Pallet_05.webp
    Pallet_05.webp
    447.9 KB · Views: 54
  • Pallet_06.webp
    Pallet_06.webp
    413.1 KB · Views: 56
  • Pallet_07.webp
    Pallet_07.webp
    376 KB · Views: 55
  • Pallet_08.webp
    Pallet_08.webp
    389.8 KB · Views: 55
  • Pallet_09.webp
    Pallet_09.webp
    453.7 KB · Views: 59
  • Pallet_10.webp
    Pallet_10.webp
    409.2 KB · Views: 60
Last edited:
Two additional pictures of the temporary mobile pallet are attached below, these two pictures show the final bracing with extra wood. For some reason my previous post only allowed upload of 10 pictures even though I selected 12?


Rgds
 

Attachments

  • Pallet_11.webp
    Pallet_11.webp
    509.9 KB · Views: 52
  • Pallet_12.webp
    Pallet_12.webp
    398.2 KB · Views: 56
You have a good idea to protect the antenna,
But I think you're going to have trouble tuning in to the satellite, every time you move it.
But it does not let it be a good idea !
sorry my enghish.
 
CH,

Thank you for your input.

Unfortunately I do not know the full provenance of the dish since purchased new so have no idea if it had been fitted with a non standard feed in its history. It came to me with an original Precision Ku feed, C120 waveguide adapter and original suport arms.

The staining is not that bad, its moderate but refuses to budge with a hot soapy water wash. As I stated above, I may paint the dish as the coating is rather thin, my concern would be that the staining may impact the adhesion of a coat of paint or cause it to bubble/flake after a period of time?

If you are in my area you are very welcome to pop in for a cuppa and a look at the dish together with the other kit that came with it.


Rgds

Thanks, there are three different official feeds that I know of for this dish at Ku band, the waveguide adapter however is likely to be the part that makes the most difference once the reflector and feed are aligned.

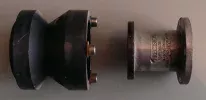
A couple of pictures of the offending articles with inside/outside dimensions should start the ball rolling.

Removing your neighbours house and garden foliage is of course the key to maximising the channels received.
 
Thanks, there are three different official feeds that I know of for this dish at Ku band, the waveguide adapter however is likely to be the part that makes the most difference once the reflector and feed are aligned.

A couple of pictures of the offending articles with inside/outside dimensions should start the ball rolling....


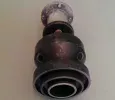
I have attached some pictures of the feed and waveguide adapter that came with the antenna. The feed looks to be the later version and is not the very early version. Similarly, the feed to C120 waveguide adapter looks to be the later version that is matched to the feed.

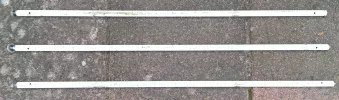
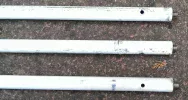
I noticed two points about the feed support arms. Firstly, they are different thread sizes at each end. In previous Precision dishes I have used the feed support arms had an M8 thread at each end. The feed support arms for the Precision 2.2m antenna have an M8 thread at the feed end and an M10 thread at the dish end.

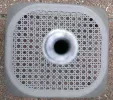
Secondly, the tube of the feed support arms is not itself tapped with the thread, the thread is in an "end plug" that pushes into the tube of the feed support arm. The wall thickness of the feed support arm is quite thin. The "end plug" can be seen in one of the pictures I have attached that shows the feed support arm end on.

The feed support arms are straight but they are a bit tatty and down to bare metal in places, however, they are OK to use with the feed. I might consider either getting the existing arms shot blasted and powder coated or replace them with similar outer diameter tube but with a thicker wall and tap the threads directly into the tube.

Pics atached below.


Rgds
 

Attachments

  • Feed_Waveguide_01.webp
    Feed_Waveguide_01.webp
    44.4 KB · Views: 55
  • Feed_Waveguide_02.webp
    Feed_Waveguide_02.webp
    59.7 KB · Views: 51
  • Feed_Support_Arms_02.webp
    Feed_Support_Arms_02.webp
    280.6 KB · Views: 47
  • Feed_Support_Arms_03.webp
    Feed_Support_Arms_03.webp
    233.3 KB · Views: 48
  • Feed_Support_Arms_04.webp
    Feed_Support_Arms_04.webp
    167.9 KB · Views: 50
Last edited:
I'm not keen on the Precision wave guide adapter, when attached to the feedhorn it lets in water, which gathers if you have cap fitted to keep out the spiders. I have used an O ring before now between the two.
 
Back
Top